Clean Your Ceilings: Simple & Effective Cleaning Tips
When was the last time you looked upward while cleaning? Scrub the floor, polish the windows, and wipe everything off the wall. But the ceiling? This one gets often forgotten, quietly collecting dust, webs, and stains. If you’ve had those moments in the late nights when you construe some grimy patch up above while lying in bed or on the couch, then it’s time to give a little love to the ceiling.
You need not awkwardly face a ceiling cleaning process with an overwhelming mission; using the right method and tools will help you finish before the buildup is revisited. Alongside cleaning, they might help to keep future buildup at bay. So, before you grab any old mop or a rickety chair, here are some smart and safe ways suggested by Bond Clean Brisbane to clean those ceilings without a messy ordeal.
Step 1: Prep the Area
Start by moving or covering furniture and nearby items with old sheets or drop cloths. This stuff will get dusted from the ceiling, so it’s better to have them protected than to clean up after.
Dusting should be done on any ceiling fan or hanging light fixture first with a microfiber duster or a pillowcase to avoid spreading the dust.
Step 2: Dust Thoroughly
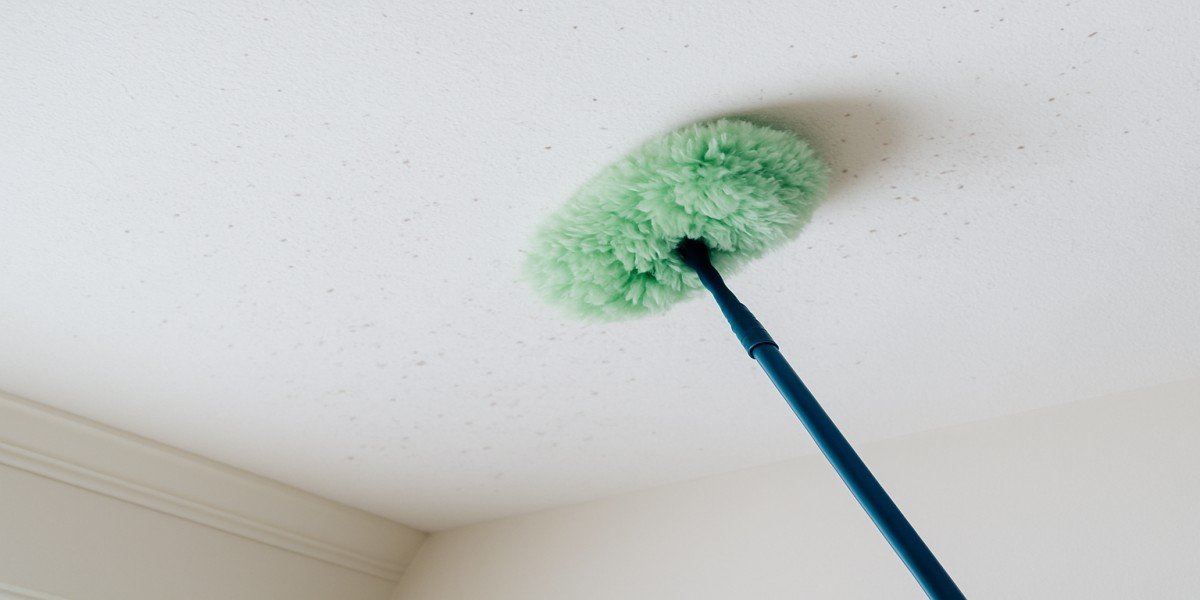
Grab your extendable microfiber duster, or if that’s not available, go for a thin, dry broom wrapped with a microfiber cloth. Softly sweep across the ceiling now and then to get rid of loose dust and cobwebs, and any remnants of insect residue.
With popcorn or textured ceilings, take a lot of care so the surface doesn’t get damaged. Vacuum cleaners with an attachment for soft brushes are a blessing in disguise, especially for delicate finishes.
Step 3: Spot Clean Stains and Marks
At that point, get rid of all given stains and smudges on the ceiling, most especially where it approaches the kitchen or near the vents, since smoke, grease, and such would tend to settle there.
Use a sponge or soft cloth to apply some drops of dishwashing liquid. Use this time to wait for the water to heat. After wringing out most of the moisture, gently dab at ceiling stains. Avoid soaking the ceiling; too much water can damage it or encourage mould growth.
For tougher stains: smoke, mildew, grease, etc., go with a vinegar and water mixture or a mild cleaner that is safe for ceilings. Always do a patch test first in an inconspicuous area, as per End of lease cleaning gold coast.
Step 4: Clean Corners and Edges
Don’t forget those edges where the ceiling nearly meets the wall: these places are quick to gather cobwebs and dust. For tight corners, a small brush or vacuum crevice tool works best.
If your ceiling is alternated with a crown moulding, give it a quick wipe-down with a damp cloth and a mild cleaner.
Step 5: Prevent Future Buildup
To put less pressure on deep ceiling-cleaning sessions, dust the ceiling once every month with the help of a microfiber duster. Extract air in your kitchen or bathroom to prevent the creation of humidity and airborne particles that tend to stick to the ceiling.
For extra layers of tall slants, consider spending on a quality extendable cleaning tool. It is so worthwhile in every way: With the effort spared and your back saved.
Wrapping Up
Cleaning your ceiling may not be glamorous, but it is definitely worth it. A clean ceiling brightens up the appearance of any space and enhances the office by enhancing indoor air quality. Remember, whenever you’re cleaning, look up—your ceiling deserves a little attention.
Also learn about 8 Quick DIY Natural Cleaners That Work: DIY Recipes and Uses